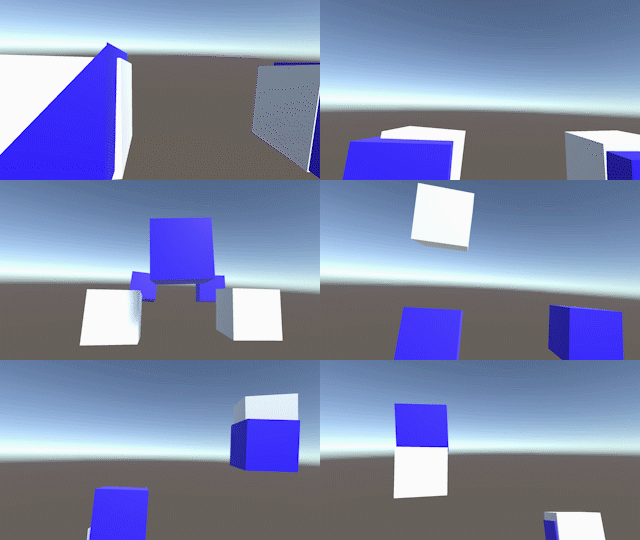
こんにちは、VR事業部の溝田です。
今回はVRデバイス(HMD及びハンドコントローラー)の入力情報(Position及びRotation)を保存し、遅延追従させるスクリプトを作成したのでご紹介します。
目的
どういうときに使えるか
・自分の手や頭に追従するオブジェクトを作成したいとき
・手の動きや頭の動きに軌跡を表示させたいとき
・FinalIKを利用して、VRデバイスの入力からキャラクターを動かす場合に、ワンテンポ遅れたキャラクターを同時に表示させたいとき
など、いろんな場面で利用が可能です。
今回は自分の手や頭に追従するオブジェクトをサンプルとして作成したのでそちらを紹介します。
実装
今回のプロジェクトは「Unity2017.4.5f1」を使用して確認しています。
GitHubにこちらのサンプルプロジェクトをアップロードしていますので、下記よりご利用ください。
github.com
とりあえず使ってみたいという方は、Unity上での確認 からどうぞ。
まずは、入力情報を保存するためのAnimationCurve情報をまとめたデータクラスを作成します。
MotionClip.cs
using UnityEngine;

namespace Forgevision.InputCapture
{
    //Motion保存用のデータクラス
    public class MotionClip
    {

        //Position及びRotationのアニメーションカーブ
        public class PosRotCurve
        {
            public AnimationCurve pos_xCurve;
            public AnimationCurve pos_yCurve;
            public AnimationCurve pos_zCurve;
            public AnimationCurve rot_xCurve;
            public AnimationCurve rot_yCurve;
            public AnimationCurve rot_zCurve;
            public AnimationCurve rot_wCurve;

            public PosRotCurve()
            {
                pos_xCurve = new AnimationCurve();
                pos_yCurve = new AnimationCurve();
                pos_zCurve = new AnimationCurve();
                rot_xCurve = new AnimationCurve();
                rot_yCurve = new AnimationCurve();
                rot_zCurve = new AnimationCurve();
                rot_wCurve = new AnimationCurve();
            }

            public void AddKeyPostionAndRotation(float time,Vector3 position, Quaternion rotation)
            {
                pos_xCurve.AddKey(time, position.x);
                pos_yCurve.AddKey(time, position.y);
                pos_zCurve.AddKey(time, position.z);
                rot_xCurve.AddKey(time, rotation.x);
                rot_yCurve.AddKey(time, rotation.y);
                rot_zCurve.AddKey(time, rotation.z);
                rot_wCurve.AddKey(time, rotation.w);
            }
        }

        //頭、両手の3点の位置及び回転を保存する。(追加可能)
        public PosRotCurve headCurve  = new PosRotCurve();
        public PosRotCurve rightCurve = new PosRotCurve();
        public PosRotCurve leftCurve = new PosRotCurve();

    }
}
positionのx,y,z及びrotationのx,y,z,wの7種類のカーブ情報を保存しています。
rotationについては、オイラー角で扱うとカーブによる回転の補間が上手くいかないので、Quartanionで扱っています。
今回は頭と両手の3点を想定しているので、
headCurve、rightCurve、leftCurveの3種類で定義していますが、
Viveトラッカーなども使いたい場合はPosRotCurveを追加すれば対応可能です。
次に録画用のクラスです。
MotionRecorder.cs
using UnityEngine;

namespace Forgevision.InputCapture
{
    public class MotionRecorder : MonoBehaviour
    {
        //録画するオブジェクトの対象
        [SerializeField]
        Transform _recordHead;
        [SerializeField]
        Transform _recordRight;
        [SerializeField]
        Transform _recordLeft;

        MotionClip _motionClip;
        float _startTime;
        float _timer = 0f;

        //モーションの1秒あたりのキー数
        readonly int _recordFPS = 30;

        enum RecordState
        {
            NONE,
            RECORDING,
            STOP
        }

        RecordState recordState = RecordState.NONE;

        void Update()
        {
            CaptureUpdate();
        }

        void CaptureUpdate()
        {
            switch (recordState)
            {
                case RecordState.RECORDING:
                    break;
                case RecordState.STOP:
                    Debug.Log("録画終了。");
                    recordState = RecordState.NONE;
                    return;
                default:
                    return;
            }

            //1秒間に recordFPS 回数分だけキャプチャする。
            if (_timer > (1f / (float)_recordFPS))
            {
                _timer -= (1f / _recordFPS);
                float playTime = Time.time - _startTime;

                if (_recordHead != null)
                {
                    _motionClip.headCurve.AddKeyPostionAndRotation(playTime, _recordHead.position, _recordHead.rotation);
                }
                if (_recordRight != null)
                {
                    _motionClip.rightCurve.AddKeyPostionAndRotation(playTime, _recordRight.position, _recordRight.rotation);
                }
                if (_recordLeft != null)
                {
                    _motionClip.leftCurve.AddKeyPostionAndRotation(playTime, _recordLeft.position, _recordLeft.rotation);
                }
            }

            _timer += Time.deltaTime;

        }

        public void StartRecord(MotionClip motionClip)
        {
            this._motionClip = motionClip;
            recordState = RecordState.RECORDING;
            _startTime = Time.time;
            _timer = 0f;
            Debug.Log("録画開始。");
        }

        public void StopRecord()
        {
            recordState = RecordState.STOP;
        }

    }
}
StartRecord()を呼ぶと録画が始まるようになってます。
recordFPS で1秒あたりにAnimationCurveに追加するキー数を設定します。
今回は30に設定してみました。
(カーブで補間するので、毎フレームキーを追加する必要はありません。)
録画が始まると、motionClipの各AnimationCurveにキーが追加されていき、モーションを保存していきます。
次に再生用のクラスです。
MotionPlayer.cs
using UnityEngine;

namespace Forgevision.InputCapture
{
    public class MotionPlayer : MonoBehaviour
    {
        //モーション再生する対象
        [SerializeField]
        Transform _targetHead;
        [SerializeField]
        Transform _targetRight;
        [SerializeField]
        Transform _targetLeft;

        MotionClip _motionClip;
        float _startTime = 0f;
        float _delayTimeSec = 0f;

        enum PlayState
        {
            NONE,
            STOP,
            PLAYING
        }

        PlayState playState = PlayState.NONE;

        void Update()
        {
            MotionUpdate();
        }

        //motionClipからデータを取り出して、対象のPosition及びRotationを変化させる。
        void MotionUpdate()
        {
            switch (playState)
            {
                case PlayState.PLAYING:
                    break;
                default:
                    return;
            }

            float playTime = Time.time - _startTime - _delayTimeSec;

            if(playTime < 0f)
            {
                return;
            }

            if (_targetHead != null)
            {

                _targetHead.SetPositionAndRotation(
                      new Vector3(_motionClip.headCurve.pos_xCurve.Evaluate(playTime)
                    , _motionClip.headCurve.pos_yCurve.Evaluate(playTime)
                    , _motionClip.headCurve.pos_zCurve.Evaluate(playTime))
                    , new Quaternion(_motionClip.headCurve.rot_xCurve.Evaluate(playTime)
                    , _motionClip.headCurve.rot_yCurve.Evaluate(playTime)
                    , _motionClip.headCurve.rot_zCurve.Evaluate(playTime)
                    , _motionClip.headCurve.rot_wCurve.Evaluate(playTime)));
            }

            if (_targetRight != null)
            {

                _targetRight.SetPositionAndRotation(
                      new Vector3(_motionClip.rightCurve.pos_xCurve.Evaluate(playTime)
                    , _motionClip.rightCurve.pos_yCurve.Evaluate(playTime)
                    , _motionClip.rightCurve.pos_zCurve.Evaluate(playTime))
                    , new Quaternion(_motionClip.rightCurve.rot_xCurve.Evaluate(playTime)
                    , _motionClip.rightCurve.rot_yCurve.Evaluate(playTime)
                    , _motionClip.rightCurve.rot_zCurve.Evaluate(playTime)
                    , _motionClip.rightCurve.rot_wCurve.Evaluate(playTime)));
            }


            if (_targetLeft != null)
            {

                _targetLeft.SetPositionAndRotation(
                      new Vector3(_motionClip.leftCurve.pos_xCurve.Evaluate(playTime)
                    , _motionClip.leftCurve.pos_yCurve.Evaluate(playTime)
                    , _motionClip.leftCurve.pos_zCurve.Evaluate(playTime))
                    , new Quaternion(_motionClip.leftCurve.rot_xCurve.Evaluate(playTime)
                    , _motionClip.leftCurve.rot_yCurve.Evaluate(playTime)
                    , _motionClip.leftCurve.rot_zCurve.Evaluate(playTime)
                    , _motionClip.leftCurve.rot_wCurve.Evaluate(playTime)));
            }
        }

        //_delayTime_sec秒遅れて再生させる。
        public void MotionPlay(MotionClip motionClip, float delayTimeSec =1f)
        {
            if (_targetHead == null && _targetRight == null && _targetLeft == null)
            {
                Debug.LogWarning("モーション再生対象が設定されていません。");
                return;
            }
            _startTime = Time.time;
            _motionClip = motionClip;
            _delayTimeSec = delayTimeSec;

            Debug.Log("モーション再生。遅延は" + string.Format("{0:#.#}", this._delayTimeSec)  + "秒");
            playState = PlayState.PLAYING;
        }

        public void MotionStop()
        {
            if (playState != PlayState.PLAYING)
            {
                return;
            }
            Debug.Log("モーション停止。");
            playState = PlayState.STOP;
        }

    }
}
MotionPlay()を呼ぶと、再生されます。その際に遅延させる秒数を決めて再生が可能です。
遅延の秒数が小さすぎると、動きがカクつく恐れがあります。
(キーを追加するタイミングで、キー付近のカーブが変化するため)
必要なクラスが揃ったので、実際に利用するために下記のクラスを作成します。
MotionManager.cs
using UnityEngine;

namespace Forgevision.InputCapture
{
    public class MotionManager : MonoBehaviour
    {
        [SerializeField]
        MotionRecorder _motionRecorder;
        [SerializeField]
        MotionPlayer _motionPlayer;

        MotionClip _motionClip = new MotionClip();
        public float _delayTimeSec = 1f;

        void Start()
        {
            _motionRecorder.StartRecord(_motionClip);
            _motionPlayer.MotionPlay(_motionClip, _delayTimeSec);
        }

    }
}
こちらでは、自分の手や頭にオブジェクトに追従させるために、実装しています。
motionClipを用意し、開始時に録画と再生を行っています。
Unity上での確認
実際にUnity上で配置してみましょう。

今回は
・Camera(head) (HMDの入力)
・RightHand (右ハンドコントローラーの入力)
・LeftHand (左ハンドコントローラーの入力)
の3オブジェクトを録画対象とし、
・HeadObject
・RightObject
・LeftObject
の3オブジェクトを再生対象としています。
また、MotionManagerという今回作成したスクリプトを制御するオブジェクトも作成しました。
MotionManagerのMotionRecordor(Script)に録画対象の3オブジェクトを
MotionManagerのMotionPlayer(Script)に再生対象の3オブジェクトを参照します。
MotionManagerのMotionManager(Script)には上記のスクリプトを参照し、DelayTime_secに遅延させたい秒数を設定します。
これで準備は完了です。
起動すると、指定秒数遅延しながら再生対象のオブジェクトが追従します。
白のcubeがVR入力の座標と回転をそのままトレースしたもの(録画対象)で、青のcubeが遅延追従させているもの(再生対象)となります。
